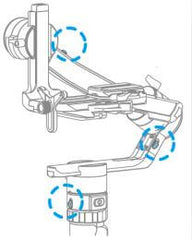
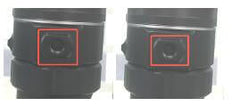
|
Battery
|
18650 rechargeable battery*4, 2200mAh, 3.7V (please pay attention to installation of batteries)
Battery charging via USB port on gimbal is not supported. Please use the charger provided for charging batteries.

|
|
Usage Time In Theory
|
12 Hours (When camera is balanced with gimbal)
|
|
Charging Time
|
≥5 hours by the charger provided and the adapter 5V/3A (quick charger is banned).
When the indicator on charger give a solid red light, that means batteries are charging. With a solid blue light, batteries are fully charged.
|
|
Materials In Main Body
|
Aluminum Alloys
|
|
Weight
|
1656g (not included the battery, shutter release cable, camera, lens and so forth)
|
|
Water-Proof Grade
|
Not Water-proof
|
|
Dimensions
|
429*240*175.3mm(Not included Detachable support frame)
|
|
Rotatable Range
|
Tilt: 230°(with limitation)
Roll: 360° (Unlimited)
Pan: 360° (Unlimited)
|
|
Controllable Range
|
Tilt: +175° to -55°
Roll: 360° (when parallel to the ground, and works in Dutch-Angle shoot mode, it could be automatically rotated 360°in one circle or several circles)
Pan: 360° (unlimited)
|
|
Quick release plate
|
There are two kinds of quick release plate together in one. Bottom mounting plate is compatible with Manfrotto PL501, Upper quick release plate is compatible with ARCA quick release system, which can be removed from the gimbal together with the camera, and fast switch between two popular quick release systems without re-assembling and re-balancing the camera.

|
|
Installation of Camera and Balance
|
Unlock the motor:Please remember to unlock the motor before mounting the camera and turning it on.
Tighten the camera: Tighten the camera with 1/4 inch screw on upper quick release plate, slightly insert upper quick plate on bottom mounting plate, the auto-lock will automatically move back to fix the upper quick release plate, mount it on bottom mounting plate, and fix the mounting plate with safety lock. Fix hot shoe at upper side of the camera with fixing frame of tilt axis to get two-way fixation. (make hot shoe less tight to make a convenience of moving camera slightly back and forth and tighten it until tilt axis is balanced).
Extension support applies to those with relatively higher heights, like Canon 5D/ 1DX series.
Note:
① Please place the motor on the right side when putting the lens forward;
② Please mount the lens support frame when the lens is longer than mounting plate.
Balance: Step by step to adjust vertical and horizontal direction of tilt axis, roll axis and pan axis. The standard of balance: camera can stay there no matter where you point it to without holding by hand (tilt axis should be perfectly balanced).


|
|
Battery Installation and Power
|
Unscrew tailcap and insert batteries based on the following picture.
|
|
On & Off
|
Power on & off: long press the function button, the display will show “FY” and release it when you hear the beep tone.

|
|
Working mode
|
Pan follow:The roll and tilt direction are fixed, and the camera moves according to the left-right movements of user's hand.
Follow mode:The roll direction is fixed, and camera moves according to the left-right movements, up-down movements of user's hand.
Lock mode:The orientation of the camera is fixed.
All Follow Mode:All three axis of gimbal follows the movements of user's hand.

|
|
Touch Screen
|
Main interface:Show some working state, change working mode and operation.

Main display shows different camera modes, status of functions, including WiFi, Bluetooth, Battery, Working Modes, Zoom & Follow Focus & the axis controlled by Multifunction Knob.
Note: Icon in grey means the option is not available.
Swipe to left Once & Twice:adjust the parameters of camera when Wifi connection between gimbal and camera is done, including ISO, Exposure Compensation, Scenes, ect,.

|
|
Button operations
|
★ Mode Button
Single tap: switch between Pan Mode /Lock Mode.
★ Joystick
1 Control gimbal and turn left/right/up/down
2 Adjust parameters of Rotation Time & Scroll Setting
★ Camera Button
1 When WIFI of camera is connected with gimbal, single tap camera button to take photo
2 When shutter release cable is attached to both camera and gimbal, single tap camera button to have camera take photo.
Please refer controllable camera listing to take photo. ★ Video Button
1 When WIFI of camera is connected with gimbal, single tap camera button to control the recording.
2 When shutter release cable is attached to both camera and gimbal, single tap camera button to control the recording.
Please refer controllable camera listing to control the recording.
★ Power Button
Long Press: power on & off
★ Trigger Button
Long Press and hold: Enter Follow Mode, back to previous mode after loose it.
You can set up this operation to Lock mode, follow mode, sport mode with APP
Double Tap: Reset gimbal, three axis return to initial level, and gimbal works in Pan Mode.
★ Function Button
Single tap function button on the main interface to lock/unlock Touch screen.
When other interfaces are activated, single tap function button to go back to the main interface.
★ Multi-function Knob
Long Press: switch between gimbal control and camera control
Single Tap:
1) when gimbal control is activated, single tap to switch among Pan Control / Roll Control / Tilt Control
2) when camera control is activated, and WiFi of camera is connected, single tap to switch
between Zoom and Follow Focus options (They are available to those cameras which provide support). Besides, when a external follow focus unit is connected, its rotation could be controlled.

|
|
How to control the camera
|
USB cable control:Control picture-taking with camera button, control the recording with video button, it works with Sony ,Canon, Nikon, Panasonic camera in controllable listing. WIFI control: Gimbal can connect with camera via Feiyu On app and WiFi. When connection is done, camera could be controlled to take photo/video/zoom/follow focus. Note:
1 WiFi feature should be included so that camera could be connected via WiFi.
2 Digital Zoom and Follow Focus could be performed when they are supported. Please refer to the list of controllable
Because Sony does not open source of protocol, thus Follow focus is supported by Sony cameras. If needed, please attach a external follow focus to Sony Camera.
|
|
Motor Power Adjustment
|
Auto-match of Motor power is available to the App or Touch Screen. Gimbal also performs the auto-match process after being turned on, according to the load detected.
|
|
Available Functions for Users
|
One tap to change working mode, directly show the state of camera connection, Bluetooth ,battery at the display.
One tap to enter Dutch Angle shoot, long exposure timelapse, Vlog Selfie and vertical shooting for TikTok, more special shooting way to be continued .
Manually set up the rotation speed, picture interval, long exposure time and the movement route in auto-rotation mode for long exposure timelapse.
Control and set up the camera, follow focus ,zoom in&out with USB cable control or WIFI control.
Customize the trigger button, motor power, shooting mode, control object ,language,etc.
Initialize the gimbal when it is not level.
Manually set up the shooting angle on tilt axis by hand.
Upgrade the firmware , Set up the parameter, virtual remote control on APP.
|
|
Extended Ports
|
There are nine extended ports in single handle AK4500(basic version)
One 1/4 thread hole on the top of sliding arm of tilt axis for installation of extension support or other accessories.

One 1/4 thread hole behind tilt motor.

USB port and 3.5mm round hole Under mounting plate to connect and control camera

Each USB Port at the back and in front of mounting plate to connect external AFK II.

1/4 thread hole at the left and right side of pan motor to extension support other accessories, such as monitor, Mic and so forth.

1/4 thread hole at the bottom of the handle to mount Tripod or other accessories.

|
|
Accessories for basic version
|
Sony USB cable: USB2.0 to Micro(A01)*1,Canon USB Cable:USB 2.0 to Mini(B01)*1, 5D Mark IVUSB Cable: USB 3.0 to Micro 3.0(A02)*1,Shutter release for Panasonic (L1)*1, Nikon&EOS R USB Cable: USB 2.0 to TypeC(C01)*1, Bottom mounting pate*1,Upper quick release plate *1,support frame for tilt axis and round holder and long screw*1 set, 18650 battery*4, Underslung arm and tighten screw*1 set , anti-slip tripod*1, support frame for lens and fixed screw*1, Thumb screw to fix the camera*1, Micro USB charging cable*1, battery charger*1, EPP box.
Note:Nikon&EOS R USB Cable: USB 2.0 to TypeC(C01)*1 is not in the package yet.
|
|
Accessories for standard version
|
Brushless AFKII*1, Underslung arm and tighten screw*1 set,Hyperlink remote control*1set,Sony USB cable:USB2.0 to Micro(A01)*1,Canon USB Cable: USB 2.0 to Mini(B01)*1, 5D Mark IVUSB Cable: USB 3.0 to Micro 3.0(A02)*1,Shutter release for Panasonic (L1)*1, Nikon&EOS R USB Cable: USB 2.0 to TypeC(C01)*1, Bottom mounting pate*1,Upper quick release plate *1,support frame for tilt axis and round holder and long screw*1 set,, 18650 battery*4, Carbon Fiber extension bar*1, anti-slip tripod*1, support frame for lens and fixed screw*1, Thumb screw to fix the camera*1, Micro USB charging cable*1, battery charger*1, EPP box.
Note:Nikon&EOS R USB Cable: USB 2.0 to TypeC(C01)*1 is not in the package yet.
|
|
Optional Accessory
|
Tripod with 1/4" screw (pay attention to its max payload), Extension Accessories and Body-mounted Weight Support for installing flash lamp/ soft light/ Microphone and other devices via cold shoes.
|


